Showing posts with label Garland. Show all posts

Tuesday, March 12, 2013

Desperate Craftwives Spring Crafts Roundup

Spring is in full swing around here! The kids are on Spring Break this week so I am going to put my crafting aside (even though I have a couple great Easter project ideas gnawing at me). But I don't want to leave anybody hangin' so here is a little roundup of my Spring projects from last year!


These Floral Embellished Eggs were super easy to make using styrofoam eggs, pins and little paper flower embellishments! 


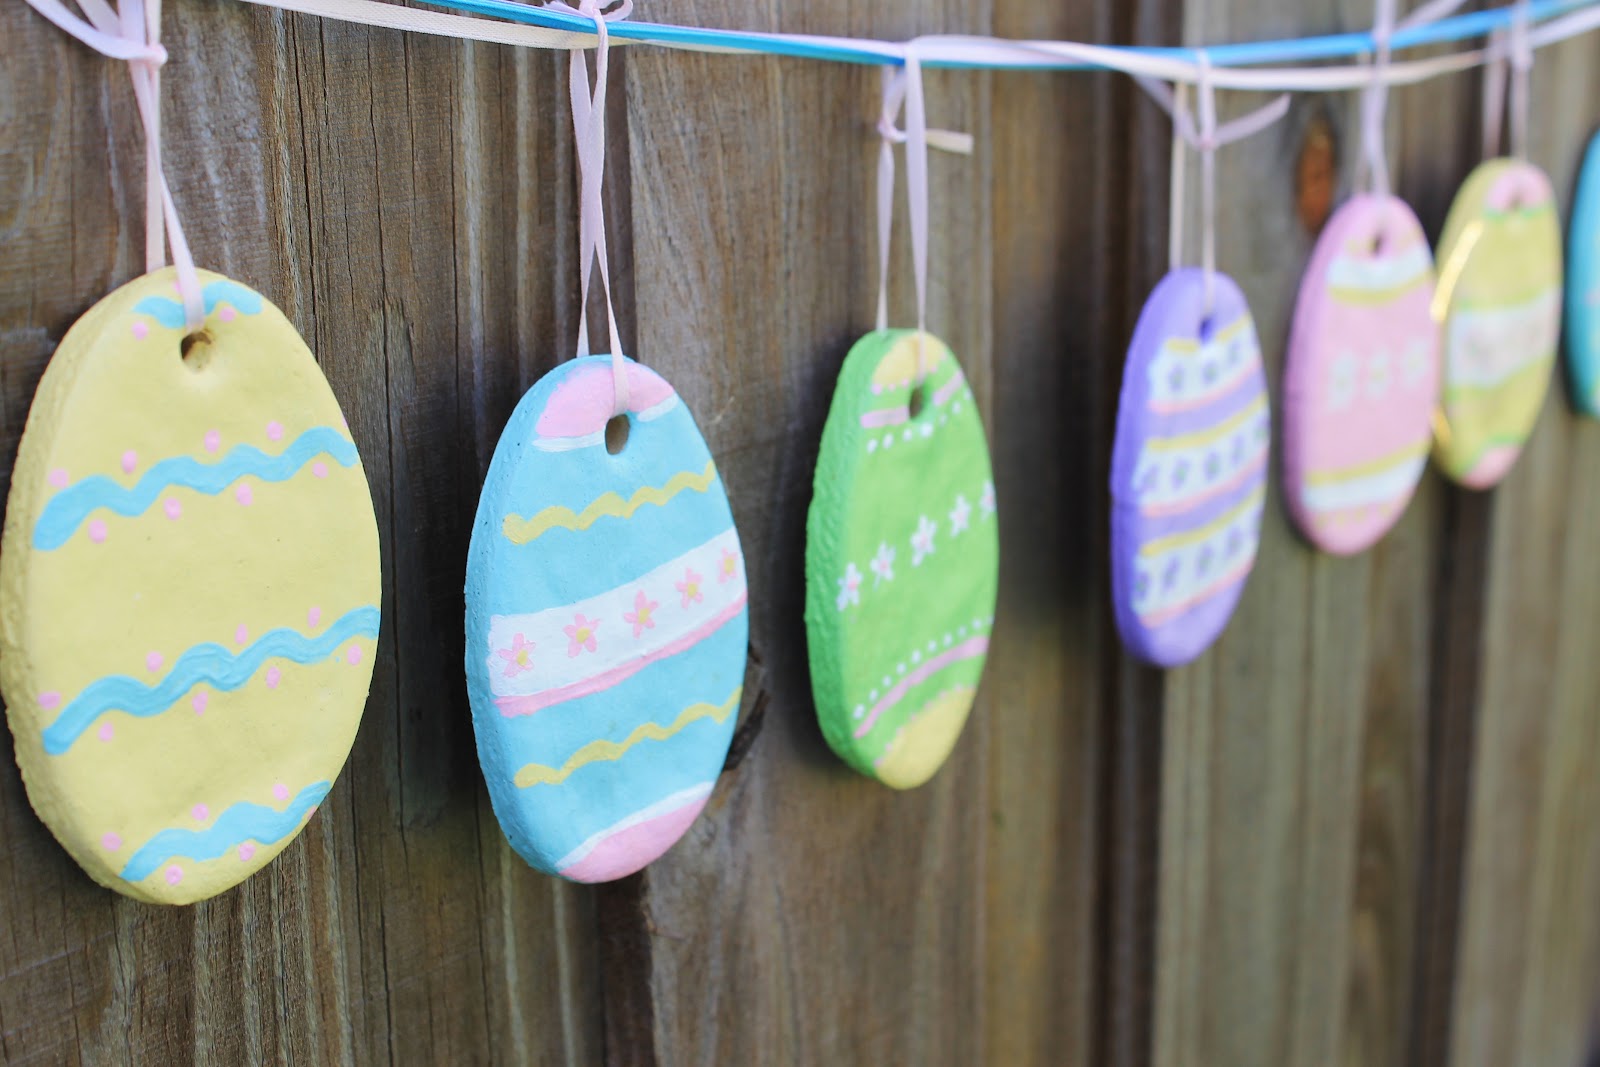
My Salt Dough Easter Egg Garland is hands down my most popular post of all time. It has been featured on Baby Center, Retail Me Not, Tatertots & Jello, Chickabug, Care.com, and more!


My kids loved these cute Bunny & Carrot Easter Cookies! The carrots are kind of like eating vegetables, right?


I made this Spring Wreath using "mambo" yarn and it was a quick & easy project! Not sure I'd have the patience to make a yarn-wrapped wreath with regular skinny yarn!


Want to get the kids involved in making some Spring decor? These Coffee Filter Flowers were the perfect craft for little ones. They made a nice bouquet for Grandma on Mother's Day.


And, of course, the Magic Jellybeans. Have your kids plant them the Saturday before Easter, water them, and they will be amazed when the jelly beans magically bloom into Lollipop Flowers on Easter morning!


Happy Spring! Thanks for visiting my blog! I'd love to have you follow along or "Like" the Desperate Craftwives Facebook Page!

-Blythe


Places I'm Partying:

The 36th AVENUE

Friday, March 16, 2012

Salt Dough Easter Egg Garland

One of my most popular posts was my Salt Dough Starfish Garland, and that was my inspiration for this Easter project. I love the way it turned out!


What You Need:
  • Salt Dough: Mix 2 cups flour & 1 cup salt with approximately 1 cup water to form dough
  • Egg-shaped Cookie Cutter
  • Acrylic Paint & Paint Brushes
  • Mod Podge
  • Ribbon for Hanging
How You Make It:
  • Roll salt dough out to about 1/4" thick and cut out egg shapes (I cut 12).
  • Poke hole in the top of each egg. I used the non-pointy end of a Bic pen.
  • Place on cookie sheet and bake at 200 degrees for several hours until eggs are hard & dry.
  • Once cooled completely, paint your eggs with pretty patterns & colors.
  • Once the paint is dry, seal with a coat of Mod Podge.
  • Tie a loop through the top of each egg with ribbon and then suspend each one from a longer ribbon to make the garland.
  • Hang garland and step back to admire how cute this project turned out!!!


Link Parties I'm Posting To:


Too Much Time On My Hands


Tip Junkie handmade projects
 
michellepaige www.lilluna.com
The 36th AVENUE
shabby creek cottageKatie's Nesting Spot
My entry into A Crafty Soiree sponsored by Appliances Online and the Bosch Washing Machines.

Friday, November 11, 2011

Salt Dough Starfish Garland

Salt dough is a great medium for making these realistic-looking starfish. We decided to hang them on a piece of jute to make a really cute garland for one of our boys' nautical-themed bedroom. They would also make great Christmas ornaments for a nautical tree.

What You Need:
  • Salt Dough: Mix 2 Cups All-Purpose Flour, 1 Cup Salt, and 3/4 to 1 Cup of Water
  • Jute or Heavy Twine
  • Toothpicks
How You Make It:
  • Take a chunk of the dough and roll it into a ball. Onto a lightly floured surface (to prevent sticking), use hands to flatten ball.
  • Once you have your circle of dough, use a toothpick to press marks into the dough where the arms of the starfish will be (or are they legs?????)
  • Remove dough between markings and use hands to round and shape the starfish form.
  • Use toothpick to make long indentation in center of each leg and to poke small holes up and down arms of starfish.
  • Poke hole in top of starfish (we used the non-pointy end of a ball point pen).
  • Let dry, either by allowing to air dry, or by baking in a 200 degree oven for several hours until hardened.
  • Once dried and cooled, apply coat of acrylic sealant.
  • Tie small loop through hole at top of starfish with jute so the stafish will hang flat when suspended.
  • String starfish on strand of jute to make garland.


Submitting this project to: 
 
Linking up to:


http://thirtyhandmadedays.com/
Tickled Pink at 504 Main

http://shabbyartboutique.blogspot.com/


Happy Go Lucky

The Girl Creative
Tip Junkie handmade projects