Showing posts with label kids. Show all posts

Wednesday, August 22, 2012

Jitters Pillow

When I was a little girl at summer camp, I used fabric crayons to make a special pillowcase for my Mom. Whenever my son has a sleepover at Grandma's house, he always wants that pillowcase. When my Mom came to visit recently, she brought a white pillowcase and fabric markers for my son to make his own.

At our "Meet the Teacher" night, my son's new Kindergarten teacher gave each student a small bag of blue "Jitter Glitter" to sprinkle on their pillows the night before school started so they would sleep well and not have "jitters" about starting Kindergarten.
So we decided to make a "Jitters Pillow" with the "Jitter Glitter" sprinkled inside.
(Bonus: keeps the glitter contained)

What You Need:
  • Pillowcase
  • Fabric markers
  • Stencils (we used cookie cutters and shapes cut from cardboard)
  • Glitter
 

How To Make It:

Let your child use his/her imagination and color away!! My son wanted a pillowcase to make his dreams come true, so he wanted the word "DREAM" with a moon and stars. I drew the "DREAM" and he colored it in. He used my starfish cookie cutter and a moon shape I cut out of cardboard to outline

Let the marker dry and at bedtime, sprinkle in the magic "Jitter Glitter" so your child will not have any jitters!

SWEET DREAMS!!

Places I'm Partying:

The 36th AVENUE

Tuesday, April 10, 2012

Magic Jellybeans

I came across this adorable printable at Nothing But Country and knew I had to do it with my kids for some Easter fun.


The Saturday before Easter, I had my son get the mail and thankfully our Magic Jellybeans had "arrived" in our mailbox just in time for Easter.


I had placed a piece of floral foam in the bottom of an old, chipped, dirty cute little pot I had living in my garage and filled it with potting soil. The kids ripped open the jellybeans and planted them.


Next, we watered our magic jellybeans and set them outside the front door.


The kids were so excited to see what they would find the next morning once the magic jellybeans grew.


Places I'm Partying:

Lil\'Luna wednesday's wowzers

Somewhat SimpleOne Artsy Mama
shabby creek cottage

Monday, April 2, 2012

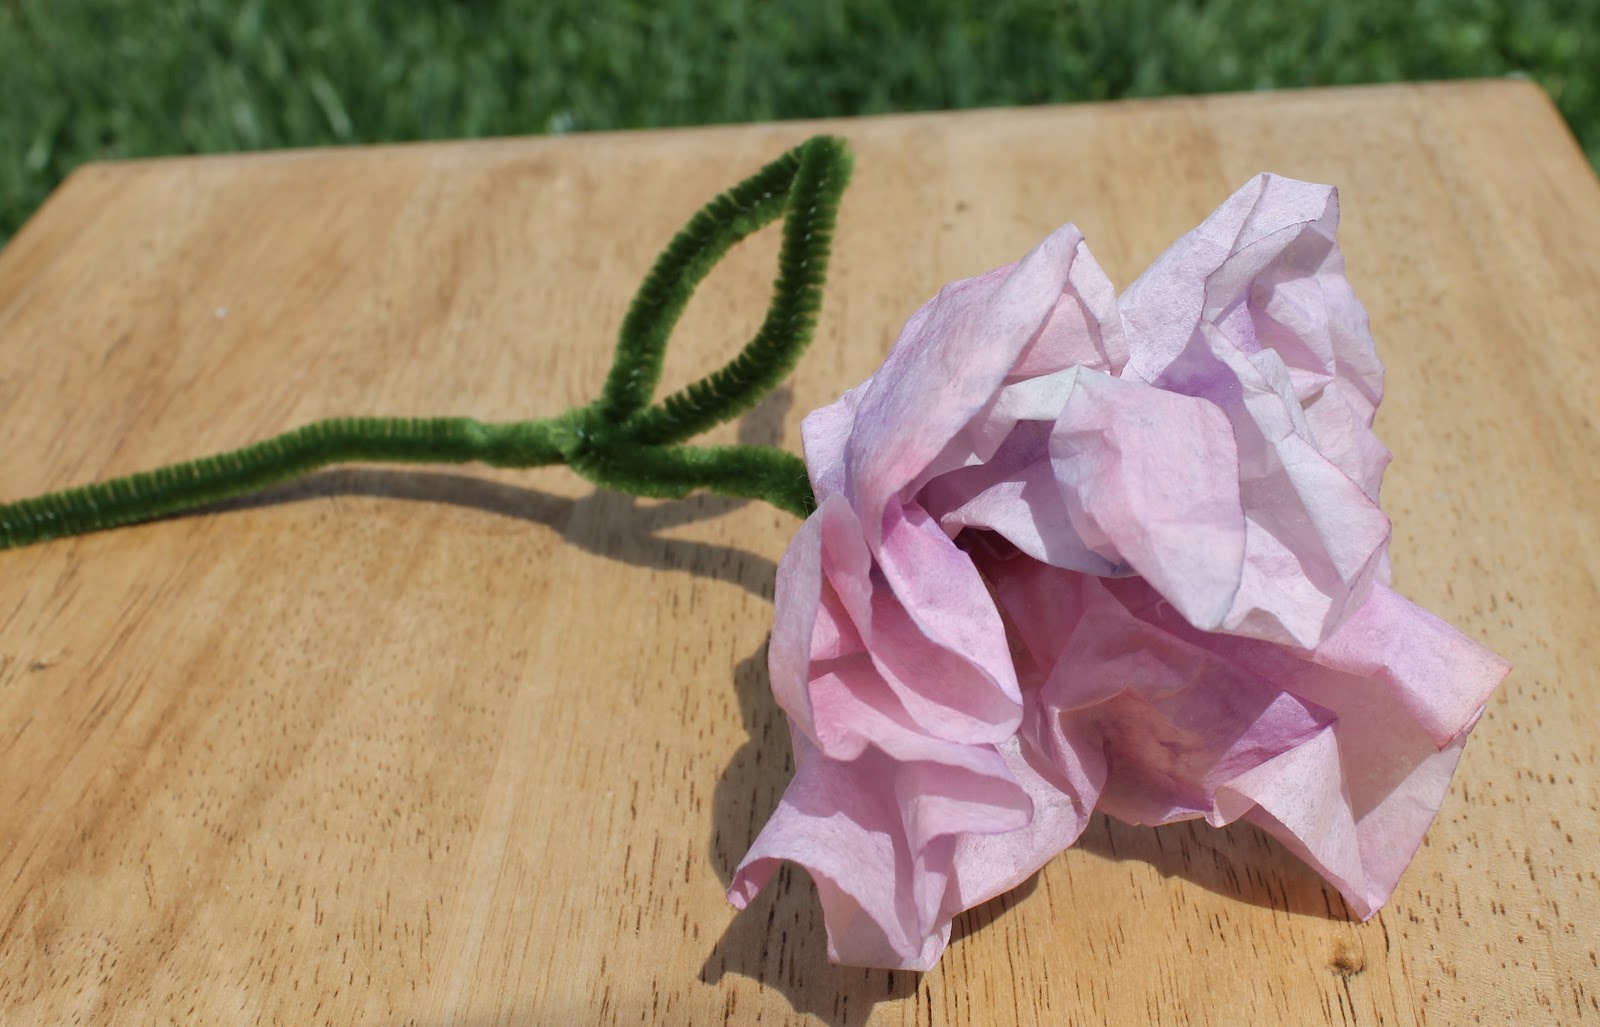
Kid-Crafted Coffee Filter Flowers

With the weather so beautiful these days, it was a perfect time to do a little craft outdoors with my kids. These coffee filter flowers are so simple and cute. And all the fun my son had afterward chasing his little sister around with the spray bottle of water was priceless (since she was giggling the whole time)!


What You Need:
  • White Coffee Filters
  • Washable Markers
  • Spray Bottle with Water
  • Green Pipe Cleaners

How To Make Them:
  1. Lay coffee filters out flat and have the kids color them with washable markers.
  2. Hold coffee filter up and spray with water. The marker will run and colors will blend.
  3. Lay flat to dry.
  4. Grab coffee filter in middle, twist bottom and bunch up to resemble flower.
  5. Take green pipe cleaners and wrap one end around bottom of flower to form stem.

And be sure to put away the unused coffee filters right away or you might end up with something like this:
She's lucky she's cute!


Places I'm Partying:

http://www.todayscreativeblog.net/
http://www.bluecricketdesign.net/

Keeping It SimpleCraft & TellTip Junkie handmade projects Lil\'Luna


My entry into Wow Me Wednesday sponsored
by Appliances Online and
Bosch Washing Machines

Wednesday, February 29, 2012

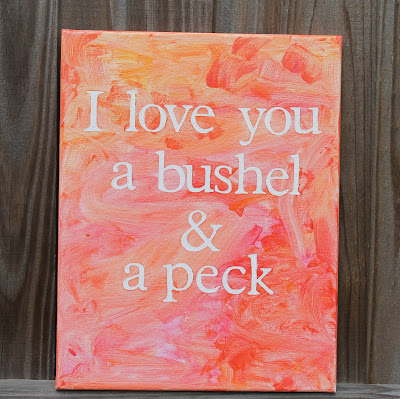
Kid Painted Canvas

My Mom has a special song that she has always sung to my kids. I thought that putting the lyrics on a canvas painted by her grandkids would be a special Christmas gift. And since Christmas has come and gone....it has now become Grandma's special birthday gift instead!


What You Need:
  • Canvas (I used an 11x14)
  • Sticky Letters. I used my Cricut to cut mine out of contact paper, but you can use adhesive vinyl or pre-cut alphabet stickers.
  • Paint (Acrylic or Crayola Kids Paint)
  • Mod Podge
  • Paint Brush(es)


How To Make It:
  • Stick letters to canvas. (FYI, I had read on several blogs that going over letters with a layer of Mod Podge keeps the paint from seeping under the letters, so I did this, but I still had some paint go under my letters. The contact paper did not adhere to the canvas as well as the adhesive vinyl letters I've used in the past. I just touched up areas with white paint as needed).
  • Choose the paint colors and hand over the brushes to the kids (preferably outside)!
    
  • Allow canvas to dry and remove stickers.
  • Paint over entire canvas with a layer of Mod Podge to seal the paint (I used Crayola Washable Paints so wanted to seal it).

Sharing at:

Tuesday, February 7, 2012

Baby Girl Wreath

We will be welcoming a new baby cousin into the family in just a few weeks (squeal!!!). I wanted to make something special for her nursery and I've been on a bit of a wreath-making kick lately, so.......


What You Need:
  • Wreath Form
  • Ribbon
  • Straight Pins
  • Felt
  • Wooden Letter
  • Needle & Thread
  • Mod Podge, Hot Glue
How You Make It:
  • Cut ribbon into lengths long enough to go around wreath form with a bit of overlap.
  • Wrap alternating pieces of ribbon around wreath and secure in place with straight pins until entire wreath is covered.
  • Apply a coat of Mod Podge to the back where the ends of the ribbon are to prevent fraying.
  • Make felt flowers: Cut a strip of felt approximately 2"x12". Fold in half lengthwise and sew ends together. Once sewn, cut slits down entire length about 3/4 of the way to the bottom. Next, starting with one end, roll up into flower and sew through bottom to secure

  • Paint wooden letter to match ribbon and let dry.
  • Glue on felt flowers and wooden letter with hot glue.


Places I'm Partying:

Tip Junkie handmade projects


The 36th AvenueToys In The DryerSee Vanessa Craft

shabby creek cottage