Showing posts with label tutorial. Show all posts

Thursday, October 25, 2012

Braided Memory Wire Bracelet

Since I discovered how easy it is to make beautiful bracelets with memory wire, I have been pretty much obsessed with it! I made a braided memory wire bracelet in the colors of my alma mater, The University of Florida - Orange & Blue - Go Gators!!!!! and posted the picture on my Facebook Page. This bracelet makes a great piece of fancy fan-wear and can easily be customized to your favorite team's colors, which is why I have had several requests for a tutorial. Since I already have my Gators bracelet, I decided to make a bracelet in the colors supporting The Children's Tumor Foundation for this tutorial.


What You Need:

  • Memory Wire
  • Beads in 2 Colors (I used 6/0 Czech Glass Beads)
  • Round Nose Pliers
  • Wire Cutters (hardware store ones, NOT ones made for jewelry)


How To Make It:
See photos below

  • Use your wire cutters to cut 7 full rounds of memory wire.
  • Cut one of the rounds in half and create a small loop at one end of each with your round nose pliers (make sure to tighten the loop all the way down).
  • Use round nose pliers to make a small loop at the end of each of the 6 of remaining rounds of memory wire to keep the beads on the wire. Make sure to tighten the loop down so it is completely closed.
  • String 3 rounds of wire with one color beads and 3 rounds of wire with second color beads. 
  • At the end of each round of wire, you will want to leave about a pinky finger's width with no beads and use your round nose pliers to create another small loop at the end (tightened down) to keep beads on the wire.
  • Next, line the rounds up in alternating colors. For me it is blue, green, blue, green, blue, green.
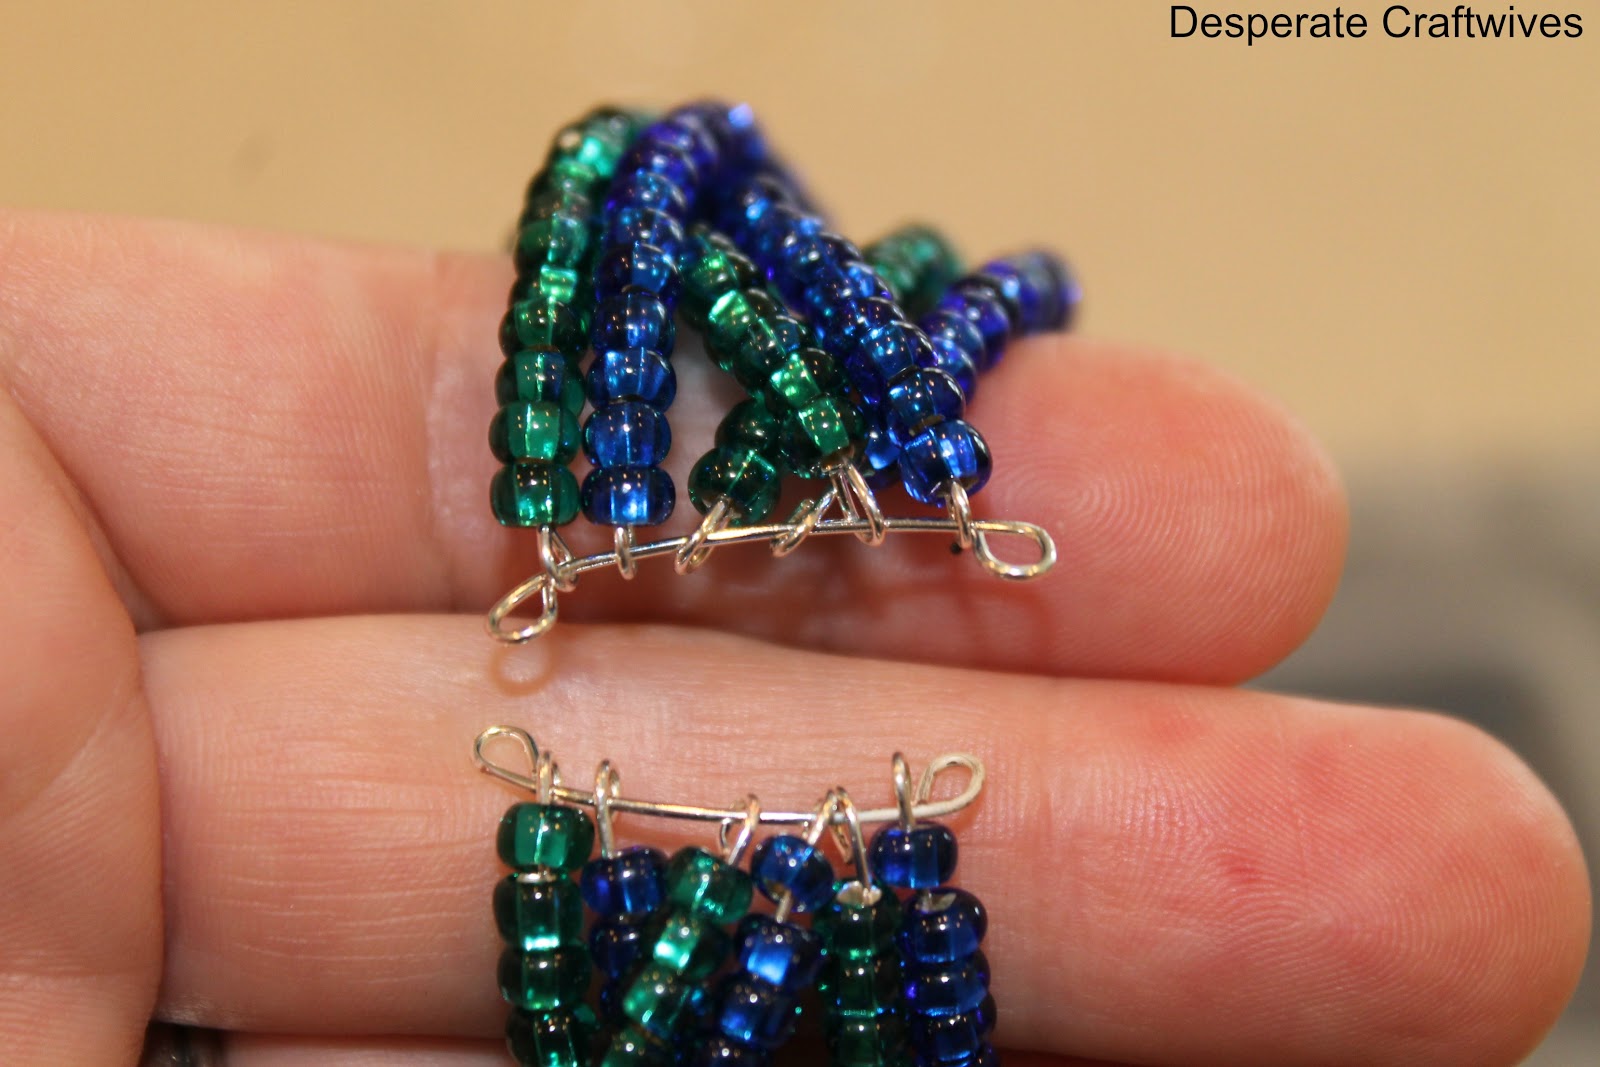
  • With the small loops at the end of each round lined up, take one of the half rounds you made earlier and  string it through all the loops (in order). Trim the end to about a pinky-width and use round-nose pliers to form another loop at the end.
  • Separate into 3 parts (blue/green - blue/green - blue/green) and braid.
  • Once braided, keep ends in order and string the other half round through the ending loops. Trim off excess and seal with another small loop at the end.




Pretty easy, huh?!
Of course, if you aren't feeling up to it, you can always buy one from my Etsy Shop ;)


Hope you've enjoyed this tutorial and are feeling inspired! I've got lots of great tutorials to share, so I'd love it if you'd follow along!
-Blythe

Places I'm Partying:


One Artsy Mama
WhipperberryTip Junkie Lil\'LunaThe 36th AVENUE

Tuesday, October 9, 2012

Memory Wire Bracelets

I was asked by a friend and fellow crafter if I had ever made a bracelet using memory wire. I have always liked the look of them, but surprisingly my answer was no, I had not ever made a bracelet with memory wire.  I even had a bunch of beads that I envisioned using with wire, but they were just collecting dust. So thank you to my friend, Kim, for inspiring me to finally make a memory wire bracelet. Turns out it is stupid easy to make a beautiful bracelet! I've already made two and see many more in my future!


What You Need:

  • Memory Wire - Bracelet Size
  • Beads
  • Round Nose Pliers
  • Wire Cutters (regular hardware store ones, NOT jewelry ones)


How To Make It:

  • The memory wire comes coiled like a spring. Determine the size of your bracelet and cut off that many coils with wire cutters. Memory wire is very hard and will ruin your jewelry wire cutters, so use a cheapo pair from the hardware store.
  • Using round nose pliers, make a small loop at one end of the wire to keep beads from falling off.
  • String beads onto wire.
  • When you've reached the end of your bracelet, use your round nose pliers to make another small loop to secure the beads.
  • I have not personally used any other method, but they do sell memory wire end caps that can be glued on rather than making that loops.


Hopefully this post will inspire others to create some beautiful memory wire jewelry. I made this bracelet standing at my kitchen island while my kids ate lunch. It was so quick & easy and I love the way it turned out! Happy Creating!

Blythe

Places I'm Partying:


www.the36thavenue.comPhotobucketshabby creek cottageHookingupwithHoH

Monday, April 9, 2012

Mambo Yarn Spring Wreath

I have seen so many gorgeous yarn-wrapped spring wreaths on fellow blogs and felt inspired, but it seemed like it would take FOREVER to wrap all that yarn around. That was until I walked by some really fat yarn in the clearance bin at Michaels. Technically, it is called "super bulky". And with yarn that fat bulky, I could wrap a wreath in no time!

What You Need:
  • Wreath Form
  • "Super Bulky" Yarn - I used Martha Stewart Crafts Mambo Yarn in Flamingo
  • Straight Pins
  • Felt in Spring-y colors
  • Hot Glue
How To Make It:
  • Pin or glue one end of yarn to wreath form and wrap around, securing opposite end of yarn when reached. Continue with additional skeens of yarn until wreath is completely covered. I had a small amount left so I formed a loop for hanging and secured the ends.
  • Make felt flowers and adhere to wreath (there are TONS of great felt flower tutorials online, but I will share a couple methods I used below).
  • Cut S-P-R-I-N-G out of felt. Cut out shapes to make a felt pennant and glue on letters.
  • Secure pennant with straight pins.
Felt Flower Methods:

A. Cut out petal shapes. Put a drop of hot glue on the narrower end and bend sides up to secure. Use needle and thread to sew petals together into a circle.
Make center for flower - can use a button or fabric, or roll up a narrow piece of felt into a spiral.

B. Take a square of felt and cut out spiral shape. Take inside end of spiral and start rolling up. Secure with hot glue or use needle and thread to sew through layers.


C. Cut strips of felt with top edge wavy/bumpy (or cut with pinking shears) in two different colors. Place a strip of one color on top of the other and roll up into flower. Secure layers at bottom with needle & thread, or use hot glue.
 

Places I'm Partying:
Sumo's Sweet Stuff
Keeping It Simple
Tip Junkie handmade projects

PhotobucketLil\'Luna
www.bluecricketdesign.net
Confessions of a Stay At Home Mommy
wednesday's wowzersshabby creek cottageOne Artsy Mama

Somewhat Simple
The 36th AVENUE

See Vanessa Craft