Sunday, May 27, 2012

Patriotic Topiary

I made this red, white and blue topiary for Fourth of July and just remembered to put it out for Memorial day too! Topiaries are one of my favorite decorations for parties, showers, holidays, etc. You can easily match them to any theme by the colors of ribbon you choose.


What You Need:
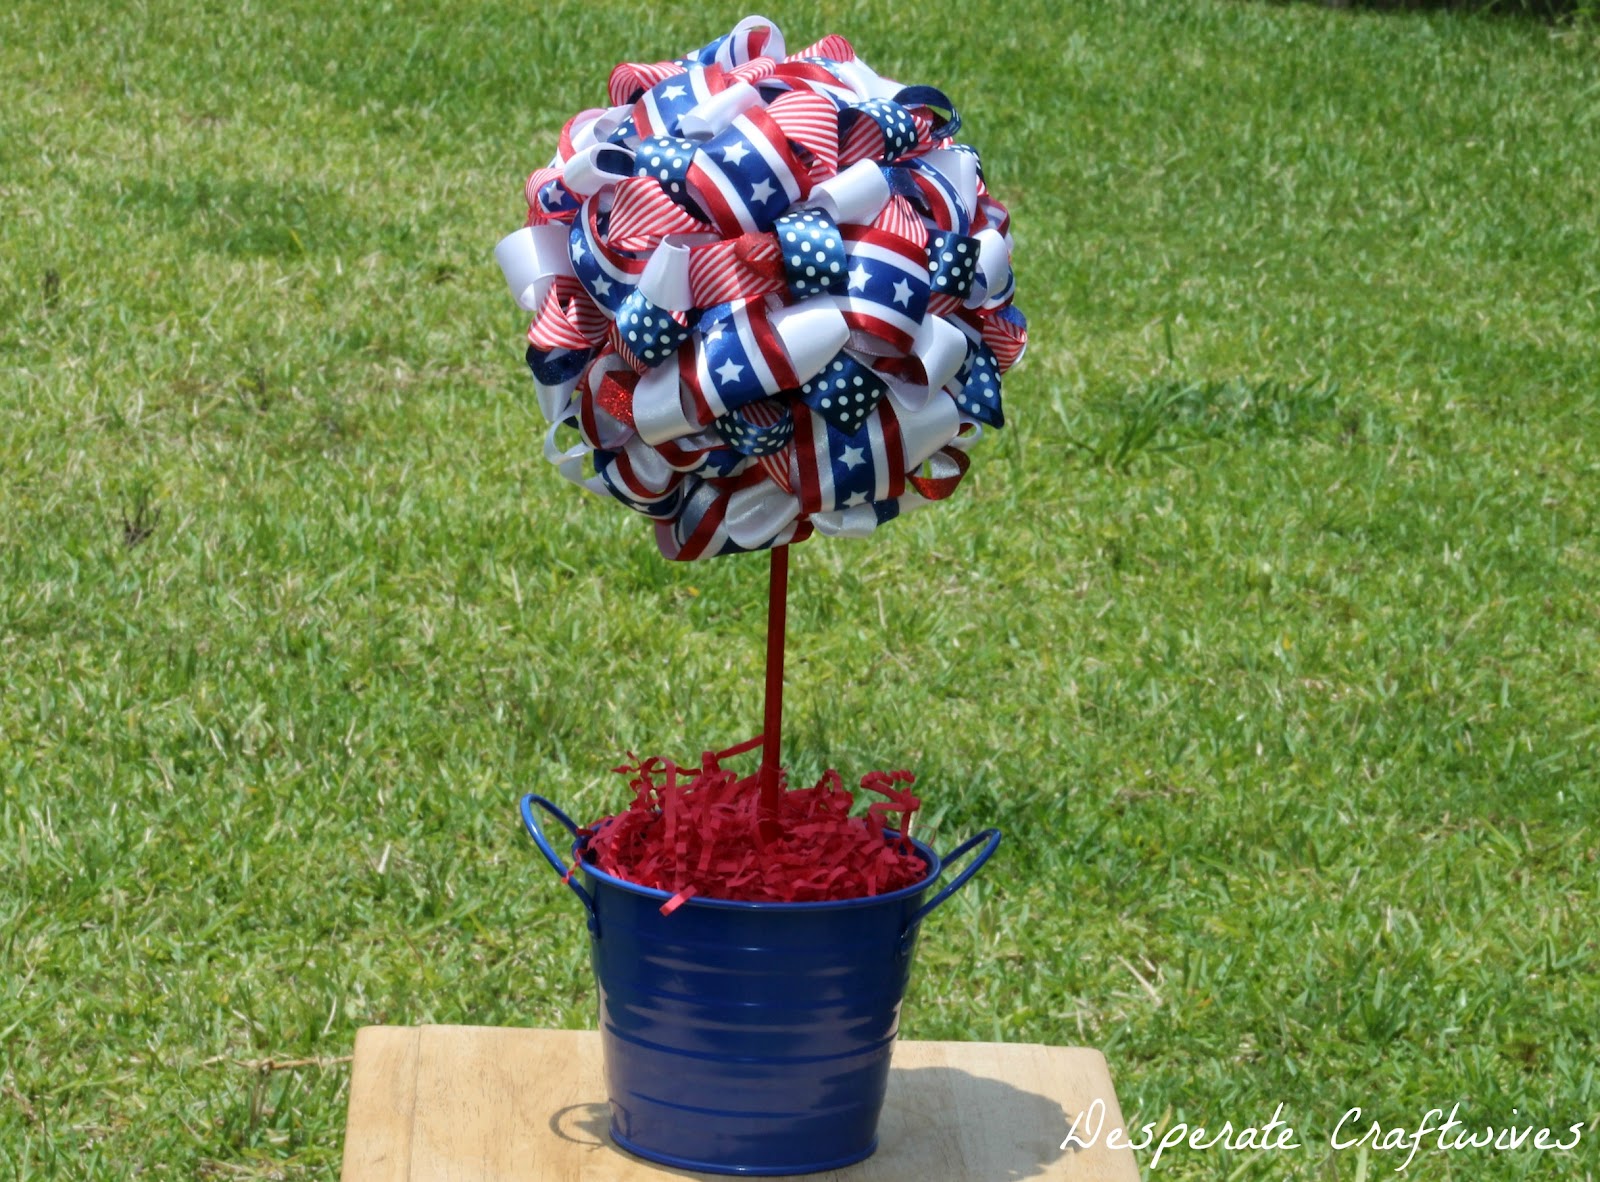
  • Red, white & blue ribbon, varying textures and widths
  • 4" Styrofoam Ball
  • Wooden Dowel
  • Floral Foam
  • Straight Pins
  • Small Bucket or Pot for Base
  • Tulle or Crinkle-Cut Paper Shreds 
How To Make It:
  • Cut ribbon into 4.5 inch pieces.
  • Loop each ribbon and secure to styrofoam ball using 1 or 2 straight pins, depending on the width of the ribbon.
  • Continue pinning ribbon loops to ball until it is completely covered. When placing loops, be sure to do them at varying angles and close together to ensure a full topiary.
  • Place floral foam into base.
  • Place one end of wooden dowel into styrofoam ball and other end into floral foam.
  • Fill base to cover foam with crinkle cut paper shreds, tulle or beads.

Click here to see my Halloween Ribbon Topiary

Places I'm Partying:


Saturday, May 26, 2012

Memorial Day Marshmallow Pops

I made marshmallow pops for the first time for my daughter's lemonade birthday party and they were so quick & easy. We are planning a neighborhood barbeque this weekend with lots of kids, so I thought I'd make some red, white & blue ones for Memorial Day.


What You Need:

  • Jumbo Marshmallows
  • Lollipop Sticks
  • White Wilton Candy Melts
  • Blue Sugar
  • Cinnamon Candies
  • Red Food Coloring
How To Make It:
Tip Junkie handmade projectsLil\'Luna


Thursday, May 24, 2012

Beaded Chalkboard Wine Bottle

I often work with beads when making jewelry, but rarely in other crafts. When I entered the One Crafty Contest over at One Artsy Mama, I made it into the Top 20 and advanced to the "bead round". I decided to try to make something that wasn't jewelry, so I made this Beaded Chalkboard Wine Bottle. I love using chalkboard paint in home decor items because you can always change it up simply by changing what is written. And I also love the look of turquoise paired with a little splash of red, and thought those colors would be nice and bold against the black background.


What You Need:
  • Empty Wine Bottle
  • Chalkboard Spray Paint
  • 24 Gauge Wire
  • Beads (I used turquoise and red chip beads from Michaels)
  • Hot Glue
How to Make It:
  • Remove label from wine bottle. I soaked mine in water and peeled off the label. There was still a bunch of adhesive left, so I used some Goof Off to remove it.
  • Spray paint bottle with chalkboard paint and dry completely.
  • Coil wire around bottle as desired to determine length and cut it just slightly longer.
  • Coil one end so beads won't come off, then string turquoise beads along length. Coil opposite end to secure beads.
  • Cut wire to be formed into heart shape
  • Coil one end of wire cut for heart so beads will not come off and string red beads along length.
  • Shape beaded wire into heart and wrap other end around frame to hold in place and keep beads from coming off the wire.
  • Wrap turquoise beads around bottle as desired and secure ends in place with hot glue.
  • Hot glue red heart in place.
Places I'm Partying:
http://www.tatertotsandjello.com/
http://www.blissfulanddomestic.com/
http://craftomaniac.blogspot.com/
http://diyhshp.blogspot.com/
Lil\'Luna

Monday, May 21, 2012

Kids Handpainted Wall Art

I have always had the worst time finding artwork for my son's room. When he was a baby, his nursery was jungle-themed, but with a light blue color scheme. The wall art that coordinated with his bedding set was just too cheesy looking and made the whole set overwhelming. I had never painted a picture before, but  figured I'd give it a go. Even if it looked silly, it would be special because it was painted by Mommy. This is what I came up with:

I painted an oval, wooden plaque from Michaels with white paint (I should have primed it first because you can see the wood "knot" showing through, but the baby never complained about it). Then I lightly drew on the words and pictures with pencil, painted with acrylic paints, and outlined everything with a black Sharpie to make it stand out better against the background.

When my son transitioned to a big boy (full size) bed, he absolutely HAD to have the robot bedding from Target. Once again, I had a heck of a time finding robot artwork to match so I whipped up another painting for his room while he napped.

Again, I just lightly drew the picture onto the canvas and painted with acrylic craft paints.

So, if you have trouble finding wall art for your kids, I suggest trying to paint one for yourself instead of spending a bunch of money on one you don't really like anyway. Worst case it looks like a silly, disfigured cartoon...but it is for a kid's room afterall, right?

Places I'm Partying:
Tip Junkie handmade projects
http://www.oneartmama.blogspot.com/

Sunday, May 13, 2012

Lemonade Birthday Party

My baby girl is turning 2 and we had a lemonade-themed birthday party. I served regular and pink lemonade, had lemon-themed food and decorated with white, yellow & pink. It turned out really cute!


I ordered the pink & yellow striped paper straws from GlitterDaisyShop

Some of the food did double-duty as decorations. I filled apothecary jars with Lemonheads, cotton candy, and pink, white & yellow meringues. I also made Jello Jigglers in lemon peels and lemon sugar cookies.

Got this idea from Pinterest - simply follow the Jello Jiggler instructions on the Jello box and pour into hollowed out lemon halves. Once set, slice with a wet knife.

These marshmallow pops were SO easy. Just stick a popsicle stick in the marshmallow, dip in melted Wilton Candy Melts, sprinkle on the sprinkles or colored sugar, and stand up in a glass until set.
 
I adapted my usual rolled sugar cookie recipe by adding lemon zest and lemon juice (recipe below). I used a lemon-shaped cookie cutter that I got from my all-time favorite cookie-cutter shop, http://www.cheapcookiecutters.com/.
If you can think of a cookie-cutter shape, chances are they have it!
For the lemon slice cookies, I used a circle cookie cutter and just cut the circle in  half.
I made pink & yellow pom poms using this tutorial and hung them from the light fixtures over my dining room and kitchen tables.


I ordered this sign from HelloLoveBoutique, where I also got a cute vintage-style lemonade birthday party invitation.

In the kitchen, I had a drink dispenser filled with lemonade and a pitcher with pink lemonade. I also made a cute pink & yellow Happy Birthday banner, which I forgot to take a picture of (oops).

Lemon Sugar Cookies:
Ingredients:
1 1/2 cups (3 sticks) softened butter
2 cups sugar
4 eggs
5 1/4 cups flour
2 tsp baking powder
1 tsp salt
2 tsp lemon juice
zest of one lemon


Directions: Cream butter and sugar. Beat in eggs, lemon juice and lemon zest. Stir in flour, baking powder and salt.

Icing: Mix 2 cups powdered sugar, 4 tsp milk, 4 tsp light corn syrup, 2 tsp lemon juice, food coloring


This was the perfect party for a little girl. Although I feel I must get away from the fruit themes next year... her first birthday was a Strawberry Party, her second birthday was lemons.......

Places I'm Partying:
http://www.craftskeepmesane.blogspot.com/
http://www.sumossweetstuff.com/
http://www.linesacrossmyface.blogspot.com/
http://www.skiptomylou.org/
http://www.craftomaniac.blogspot.com/
http://www.cherishedbliss.com/
http://www.thenymelrosefamily.blogspot.com/
http://www.thediydreamer.blogspot.com/
http://www.gingersnapcrafts.com/
http://www.theshabbycreekcottage.com/
http://www.the36thavenue.com/
http://www.igottacreate.blogspot.com/
http://www.504main.com/
http://www.whipperberry.com/
http://www.tatertotsandjello.com/
http://www.ourthriftyideas.com/
http://www.tipjunkie.com/

Tip Junkie handmade projects


Tuesday, May 8, 2012

Salt Dough Flower Magnets

Back in March when I was making my Salt Dough Easter Egg Garland, I had a little leftover dough and decided I would attempt to make a little flower to see how it held up to baking. It turned out really cute and now I wish I had made more than one! But there is always more salt dough in my future.....


What You Need:
  • Flour, Salt, Water
  • Acrylic Paint
  • Glue
  • Magnet
  • Mod Podge or Sealer
How To Make It:
  • Make salt dough: mix 2 cups of flour, 1 cup of salt, and approximately 1 cup of water
  • To form each petal, make a small ball of dough and press down with thumb to form a flattened oval. Next take one end of the oval and pinch ends together to form petal shape.
  • Gather the individual petals into a circle and place another small ball of dough in the middle. Press down gently to form center of flower.
  • Place flower on cookie sheet and bake at 200 degrees for several hours until dough is hard and dry.
  • Allow to cool completely.
  • Paint with acrylic paint as desired.
  • Mod Podge to seal paint and glue magnet on back.
The lone flower in the back of all the Easter Eggs
Finished flower stuck on the fridge
Salt dough is always great to use when crafting with kids. They could paint these flowers to make a special gift for Mom or Grandma for Mother's Day.

Places I'm Partying:


Sunday, May 6, 2012

Key Holder

Any member of my family can tell you that I am constantly losing my keys. I can have them in my hand, open the car door, put kids in the car seats and PRESTO! my keys have vanished! I look everywhere in the car thinking I've lost my mind until I find them....usually in plain sight. I am just as bad at home. Sometimes I throw them in my purse, sometimes in the diaper bag, sometimes on the counter. I need to have a pager for my car keys like I have for the cordless phone (which I always lose too)! Anyway, I came across this wooden key holder at WalMart the other day and decided I would make it pretty and give it the old college try to put my keys in one spot.


What You Need:
  • Wooden Key Holder
  • Scrapbook Paper
  • Mod Podge
  • Acrylic Paint
  • Scissors, Paint Brush
How To Make It:
  • Place the key holder upside down on the reverse side of a piece of scrapbook paper and trace the outline.
  • Cut out shape.
  • Paint edges with acrylic paint in a color that coordinates with your scrapbook paper and let dry.
  • Apply a very thin layer of Mod Podge to the wooden key holder and stick on the scrapbook paper.
  • Once dried completely, put several layers of Mod Podge on, letting each layer dry before applying the next.

 Now...if I could just find my keys to hang them on this cute key holder........
(seriously...those are my husband's keys in the pic)

Sharing this post at these awesome blogs:
http://www.craftomaniac.blogspot.com/