Showing posts with label wreath. Show all posts

Monday, September 10, 2012

BOO Wreath

I love Fall! Aside from all the delicious-ness at Starbucks (can you say Salted Caramel Mocha?), I get to decorate for Halloween (even if it is a tad early)! 

I am guest posting today at One Artsy Mama and sharing this super cute Halloween Wreath.
Head on over and check it out! But be sure to come back and mosey around my blog a bit...I love having company!!!


And if you haven't heard, I am hosting an auction benefiting The Children's Tumor Foundation on The Desperate Craftwives Facebook Page. One item per day will be listed throughout the month of September. I have some amazing items that will be up for bid so be sure to check each day. All donations are made directly to CTF and are tax-deductible, so you can totally justify buying yourself a little goody (or two)!

And for more Halloween decorations, be sure to check out these posts:
Framed BOO
Halloween Ribbon Topiary
Halloween Word Collage
Decoupaged BOO Letters

Blythe

Places I'm Partying:
shabby creek cottagewww.tipjunkie.com
www.sugarbeecrafts.com
www.thewinthropchronicles.blogspot.com
www.thenymelrosefamily.com
www.lilluna.com
www.gingersnapcrafts.com
www.jaqsstudio.com
www.the36thavenue.com
www.igottacreate.blogspot.com
www.happyhourprojects.com
www.oneartsymama.com
www.littlebeckyhomecky.com
www.thegrantlife.com
www.itsybitsypaperblog.com
www.tatertotsandjello.com
www.alderberryhill.com
www.sumossweetstuff.com
www.craft-o-maniac.com

HookingupwithHoH

Monday, April 9, 2012

Mambo Yarn Spring Wreath

I have seen so many gorgeous yarn-wrapped spring wreaths on fellow blogs and felt inspired, but it seemed like it would take FOREVER to wrap all that yarn around. That was until I walked by some really fat yarn in the clearance bin at Michaels. Technically, it is called "super bulky". And with yarn that fat bulky, I could wrap a wreath in no time!

What You Need:
  • Wreath Form
  • "Super Bulky" Yarn - I used Martha Stewart Crafts Mambo Yarn in Flamingo
  • Straight Pins
  • Felt in Spring-y colors
  • Hot Glue
How To Make It:
  • Pin or glue one end of yarn to wreath form and wrap around, securing opposite end of yarn when reached. Continue with additional skeens of yarn until wreath is completely covered. I had a small amount left so I formed a loop for hanging and secured the ends.
  • Make felt flowers and adhere to wreath (there are TONS of great felt flower tutorials online, but I will share a couple methods I used below).
  • Cut S-P-R-I-N-G out of felt. Cut out shapes to make a felt pennant and glue on letters.
  • Secure pennant with straight pins.
Felt Flower Methods:

A. Cut out petal shapes. Put a drop of hot glue on the narrower end and bend sides up to secure. Use needle and thread to sew petals together into a circle.
Make center for flower - can use a button or fabric, or roll up a narrow piece of felt into a spiral.

B. Take a square of felt and cut out spiral shape. Take inside end of spiral and start rolling up. Secure with hot glue or use needle and thread to sew through layers.


C. Cut strips of felt with top edge wavy/bumpy (or cut with pinking shears) in two different colors. Place a strip of one color on top of the other and roll up into flower. Secure layers at bottom with needle & thread, or use hot glue.
 

Places I'm Partying:
Sumo's Sweet Stuff
Keeping It Simple
Tip Junkie handmade projects

PhotobucketLil\'Luna
www.bluecricketdesign.net
Confessions of a Stay At Home Mommy
wednesday's wowzersshabby creek cottageOne Artsy Mama

Somewhat Simple
The 36th AVENUE

See Vanessa Craft

Tuesday, February 7, 2012

Baby Girl Wreath

We will be welcoming a new baby cousin into the family in just a few weeks (squeal!!!). I wanted to make something special for her nursery and I've been on a bit of a wreath-making kick lately, so.......


What You Need:
  • Wreath Form
  • Ribbon
  • Straight Pins
  • Felt
  • Wooden Letter
  • Needle & Thread
  • Mod Podge, Hot Glue
How You Make It:
  • Cut ribbon into lengths long enough to go around wreath form with a bit of overlap.
  • Wrap alternating pieces of ribbon around wreath and secure in place with straight pins until entire wreath is covered.
  • Apply a coat of Mod Podge to the back where the ends of the ribbon are to prevent fraying.
  • Make felt flowers: Cut a strip of felt approximately 2"x12". Fold in half lengthwise and sew ends together. Once sewn, cut slits down entire length about 3/4 of the way to the bottom. Next, starting with one end, roll up into flower and sew through bottom to secure

  • Paint wooden letter to match ribbon and let dry.
  • Glue on felt flowers and wooden letter with hot glue.


Places I'm Partying:

Tip Junkie handmade projects


The 36th AvenueToys In The DryerSee Vanessa Craft

shabby creek cottage


Tuesday, November 1, 2011

Fall Wreath

November is here! It is time to take down the Halloween decorations and deck the house out for Fall.
This gorgeous wreath would be great on your front door or inside the house.


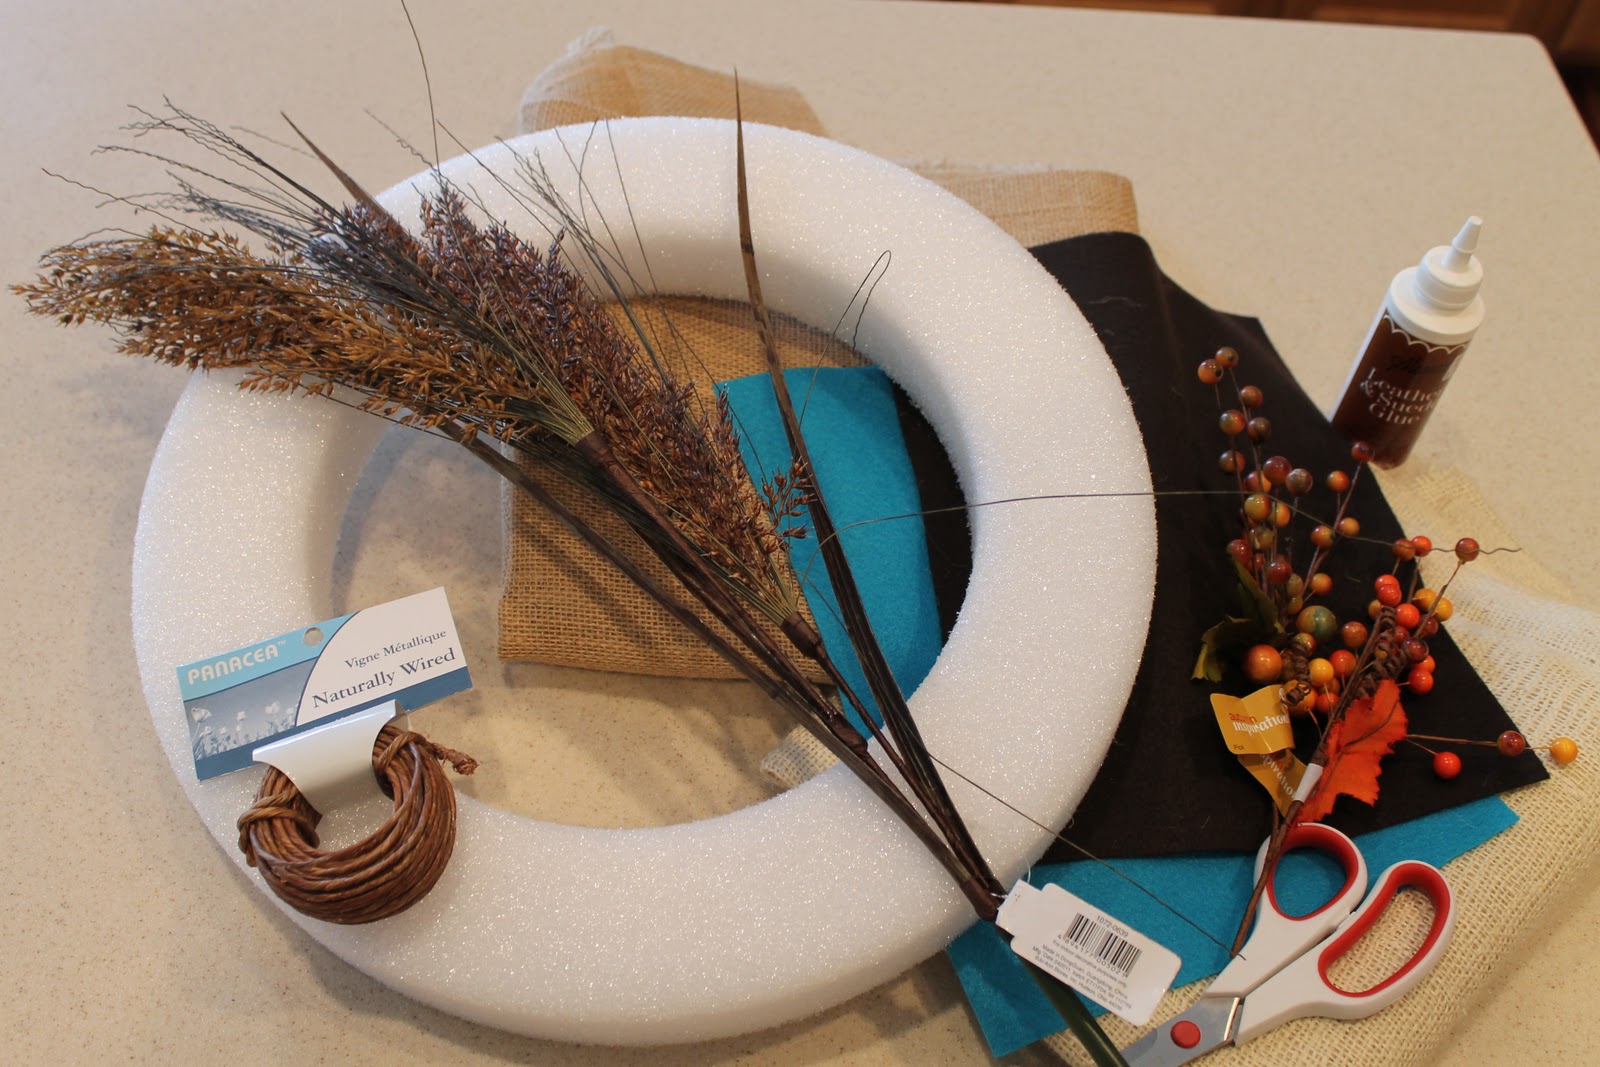
What You Need:
  • Styrofoam Wreath Form
  • Burlap (1 yard)
  • Felt in Various Colors for Flowers
  • Hot Glue Gun
  • Fall Picks
  • Ribbon
  • Needle and Thread
  • "Naturally" Covered Floral Wire

Note: I wasn't exactly sure how I was going to design this wreath before I started, so not everything shown in picture was actually used.

How to Make It:


  •  Cut burlap into strips 4-5" wide. Hot glue end of one strip to back of wreath and wrap around form. When you reach end of strip, glue it down. Repeat until entire wreath is covered.
  • Glue one end of covered floral wire to back of wreath and wrap around at a diagonal until you've made it all the way around. Glue other end to wreath. Ribbon can be used instead if you prefer.
  • Make felt flowers: Cut sheet of craft felt into strips about 2" wide. Fold in half lengthwise and sew ends together (lengthwise). Next take scissors and cut slits from top about three quarters of the way down to the seam all the way down the length of the felt (can change the look of the petals by either cutting at a diagonal or straight down). Starting at one end, tightly roll the felt up. Once rolled completely, stick threaded needle all the way through the bottom layers of felt to sew them together.


  • Use hot glue to adhere felt flowers to wreath.


  • Add fall-colored floral pick.
  • Tie coordinating ribbon around top so wreath can be hung.


  • Places We're Partying:


    Photobucket